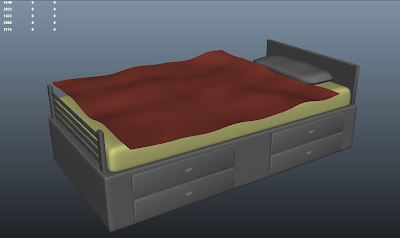
This month was a rather difficult one as I had a lot to learn. I have agreed for Hero 1.0 to learn Maya nCloth to add a duvet to a bed in the film. The bed will need the nCloth fixed to it as in the film a small boy will be jumping out of it. Here is what I had to go through to get it done.
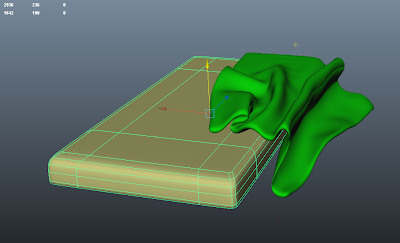
In the image above you can see the stage after I have created nCloth in Maya, at this stage all that is happening is the default gravity in Maya is pulling the cloth down. I found that it will not interact with its surroundings, in the case the bed, if you don't tell it to. To allow objects in the scene to interact with the cloth I needed to add to the object the tool called Create passive collider. This will allow the cloth to land and take from around the object.
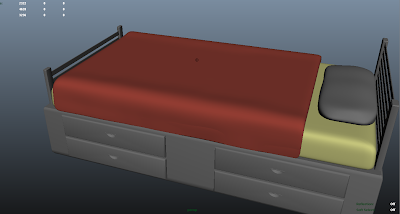
at this point in the task I found myself trying to make the cloth stay on the bed, as you can see in the image below the cloth is sliding off to one side, I tried a number of things like trying to key frame is position to stop it falling off, this didn't work and I found myself searching through the internet. After a long while I found that when you add the Create passive collider to an object it creates preferences allowing you to increase certain options on the object. These options are Bounce, friction and stickiness.
What I found when upping the Bounce up to a higher number then 0.050 you will get a slight bounce of the mattress when the cloth hit it, which in real life does not happen. I turned this option all the way down. When it came to friction I found that I had found the answer to myearlier problem, when I turned this up and played my animation through the cloth stayed on the bed and did not slide off. I was very pleased with the results. stickiness is the opposite to the bounce option, it means that if the cloth hit it once then it would stay in that position and not move, it would also have very little influence when it becomes effected by Maya fields such as wind or gravity.
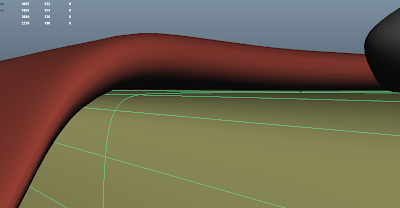
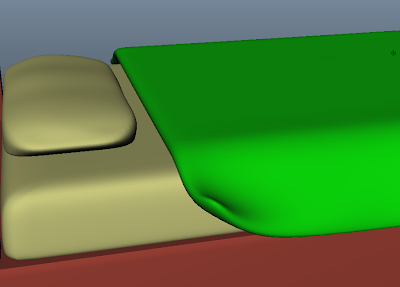
It seemed like the more and more I looked into nCloth and its options the more and more problems my cloth got. After close inspection I realised that I was getting mesh deforming into itself, the image below shows what I mean with this problem.
I found out that this is called clipping and its very common when using nCloth, there are options to pain on thickness where is happens but I know that it's not too noticeable when the cloth is thinner, as you can see its way thick in my project. I will later try and thick this by scaling the mesh down.
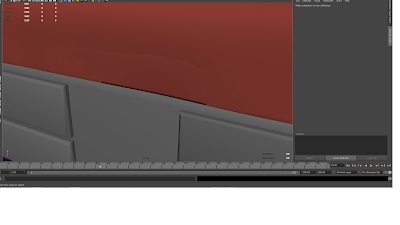
I came across a rather simple problem when it came to nCloth; this was that I couldn't change the colour of my Lambert! It's usually in the attribute editor but it just wasn't there, I was stuck with red if Kofi asked for a different colour. As you can see there is no Lambert attribute menu.
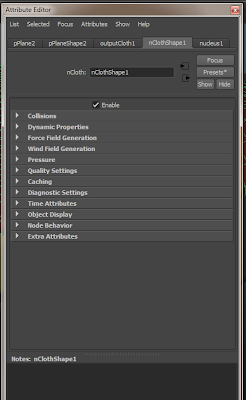
I researched how to do it and I kept finding AE display under the nCloth submenu, however, these were all on earlier versions of Maya and in Maya 2011 it wasn't there. After a few hours of trying I found myself in the help menu of Maya and asking for AE Display, this is what came up
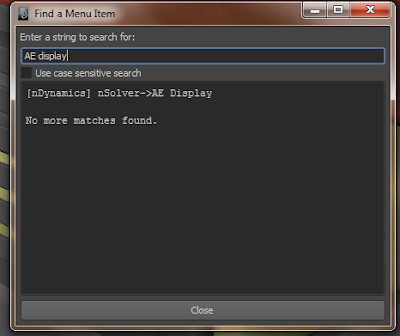
another problem solved. I could now change the colour of my mesh! (I later found out that I could have also used the hypershade)
While doing my research I came across a very interesting tool which allowed me to play with the mesh while it was being animated. For example I could interact with it mess with my passive colliders such as the mattress.
In the pictures bellow I tried to show what I meant. The tool is called interactive playback, and I used it to quickly move the mattress up then down to get result shown bellow. I know it won't seem clear but the mesh actually turned almost 360.
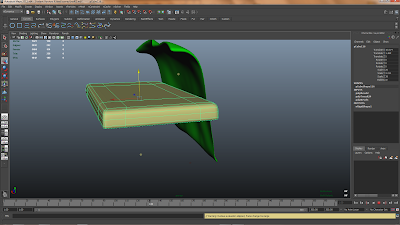
This next image is of another interactive playback test, I tried a smoother approach and let the cloth deform slowly, it wasn't a perfect deformation but I could see how the gravity was affecting the cloth.
It was quite fun!
My next problem with nCloth was this strange space that was leaving between the mesh and the passive collider,
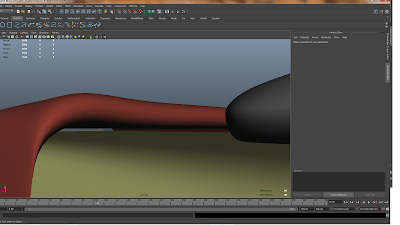
I must admit I almost gave up on this one, what I found that kind of work but reset itself each time was moving the passive collider to the right place once the mesh had settled, this was obviously pointless and could not be used in a final film. The gap was really annoying.
what I found was that in the attribute editor you have an option of seeing the collision thinness, this is available for both nCloth mesh and Passive colliders, if you look under collisions> solver display you can see that right now it's turned off so I cant much at the moment.
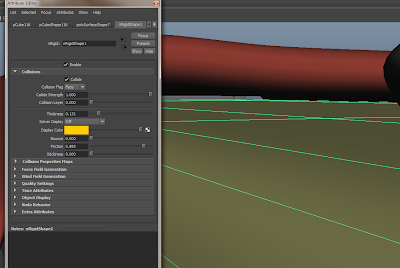
As I turned it on for both mesh and passive collider this is what happened
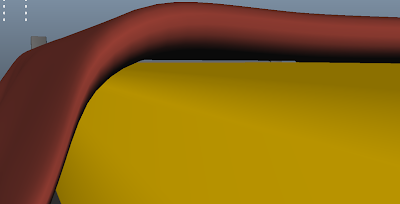
As you can see I got an orange mesh appear, this is showing me where the objects will come to rest, in other words, the spaces that have been a bother.
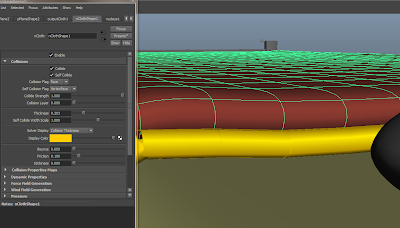
I lowered the thinness for the and I got the result I wanted, it was quite hard knowing where I needed to stop becasue I couldn't see the original objects, I had to switch to wireframe to get a better idea. This is how it turned out.
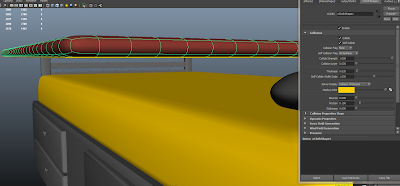
Problem solved!!
There are other aspects of nCloth which i still need to tackle, i need to be able to pick it up from a corner and have it move naturally incase thats what kofi wants, this is as far as I have gotten with character interaction
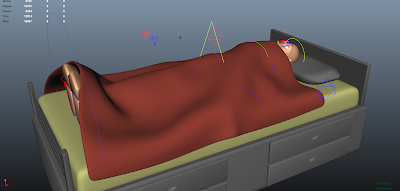
It's not much but I believe with a little bit more parctise it can be done.
Thursday, 24 February 2011
Wednesday, 23 February 2011
UV mapping
This month I had to UV map a few object in Maya. i had to do this before i could texture them. I UV mapped the sward fish and the sofa which i did back in November.
Here is an image of the fish
at this stage it is only just been automatically UV mapped by Maya, it's no use to me right now, in the second picture you able to see a fish taking place. i only did one side as it's a trophy fish and only half will show.
As you can see, I've added colour to the UV map and it's worked out pretty well when you look at it in Maya. By learning texturing I am able to become a better modeller as I know that 100% of the time texturing will be needed.
Another example of what i learnt this month is my uv mapped and textured sofa, i had a good idea of how to do it when i did the fish so i gave it a go. This was the result, I'm very happy with the outcome, mainly because i believe it really fits in with the surroundings when placed into the scene.
the following images show my procces of UV mapping the chairs for the inside of the deep.
the image above is the texture i will be using for the seats, I chose it because of the buttons. when using a bump map i should be able to get a cool effect.
the image above shows the main tools i used to create the UVs for the chair. the consist of the cut tool, the unfold tool, and the stich tool.
this is the result of using the tools listed above, i have UV mapped the top part of the chair. due to the shampe it was really quick and easy to do.
at this stage i had moved on to the next part of the chair. i have began to work on the bottom cushion.
Bottom cushion UV mapped and ready to go.
here is a tiled version of the texture i will use. as you can see its not going to look very realistic. the reason i tiled it was to see how it would look compared to the image of the red sofa bellow.
at this stage i had created a psd network in maya and started to apply the texture to it in photoshop.
this is the result i got every time i loaded the texture into maya.
the image above shows the from cushion texture almost finished, all i needed now was the sides and back to be done. the hardest bit was done :)
this image above shows a light test when i added the bump map, as you can see it looks too rough for the effect i wanted, i was looking for something smoother and with a leather effect.
after playing with the depth of the bump map i achieved this look, i believe that it looks good enough to be incloded in the film.
this is the final outcome of my texture for the chair. i am very pleased with the result. much more pleased than the fish i textured earlier on in the week.
Friday, 4 February 2011
personal learning
Personal learning
I enjoy working for the movies which I am a team member for but I also really like doing my own work when I have the time, I am aiming to get an idea of the work which is currently being done at framestore, my understanding is that there is a lot of high poly count modelling going on. High poly count modelling is something which I really want to get into. I have found a few tutorials online which I have been helping me get a better understanding of how it works.
I know that there is a method of doing in and that it's not just simply sculpting in a modelling software, I have learnt that you need to start with a low poly count model and build it up in layers. There are things which always need to be done before you start sculpting. E.g. the UV maps needs to be done before you can export any work from Maya to ZBrush or Mudbox. If this is not done properly I won't be able to add displacement maps or textures if I want to use the model for animation.
Here is an example of my sculpting work
this first images is a very early stage of a lizard man character I was modelling. As you can see I have the basic shape but not much detail.
this next image shows my lizard man gaining a little bit more life as it now know has a more natural look.
this last image is what I finished off with, at this stage I realised that I couldn't really do much with this model besides look at it, this is because I never sorted out the CVs when I had the chance and now it's a little too late, and it would be near enough impossible to do so as it's so high detailed.
house modelling
For heros 1.0 i was also asked to model two houses for an exterior shot, i had some practise over the summer in modelling buildings so i sound this quite easy as they were a lot more simple then the ones i was modelling before.
here are the finished models of the houses.
the top image shows the maya model of the house, i would have liked to add more detial but then was told that it was going to be used in a exterior shot so it wasnt needed. the second image is a photo i used for reference.
the first images is the model and the second the photo i used to create it. as you can see its very similar and i was very happy with the results.
Thursday, 3 February 2011
nCloth - curtains
During this month I found myself working on a load of things, mainly on nCloth again, I had figured it out but it still wasn't up to scratch. I was also set the task of creating curtain for the interior shots in Hero 1.0. During this task I also started to experiment with Maya dynamics, adding air and turbulence to the scene meant that the curtains would move around like if they were real.
here is a picture of the curtains
as you can see with the picture above I have also textured the curtains, I got this texture from the director, it was his choice, we both said that it wasn't very good. We're currently looking for something better.
I found myself learning quick when it came to nCloth, from my understanding I know that it is use a lot in many industries and it's also industry approved.
i run a few test with the curtian after i had set up the attributes and found that they had worked as i first thought. the only problem is that the cloth is a bit slow to react when reacting with characters in the animation.
Subscribe to:
Posts (Atom)